Amending a Non-Retail Prescription Using the Rx Number
The following steps indicate how Amend LTC works when NO prescriptions are highlighted on the Workbench.
- NO prescriptions should be highlighted on the Workbench. Press the Deselect All action button to ensure no prescriptions are highlighted.
- Press the Correct button.
- Press Amend LTC in the Correct Rx window.
- The Select Prescription window opens. Search for the prescription(s) by Rx# or Patient.
- To Search by Rx#: Enter the prescription number(s) in the Rx(s) field and press the OK button.
- To Search by Patient: Enter the patient’s name in the Patient field and press the OK button. Patient Search will appear. Highlight the patient and press the OK button. The patient’s Profile will appear. Highlight the prescription(s) and press the OK button.
- The prescription will open in an Rx Detail pop-up window, in the Amend LTC mode.
- Make any required changes.
- Press the OK button to save and apply the changes.
- A prompt will ask if you would like to print a new label set. Press Yes or No in the prompt.
- If multiple prescriptions were selected for Amend LTC, the next prescription will appear in Rx Detail.
Once all selected prescriptions have been amended, the screen returns to the Workbench. The prescriptions will have status AMEND. The Audit History for each prescription will display *LTC* to identify the Amend LTC transaction.
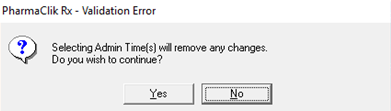
Note: If a prescription has administration times outlined in the Administration Details window and you are amending this prescription to update the Admin Time(s) outlined in Rx Detail, the Administration Details window appears with a prompt to ensure you are reviewing or making any necessary changes prior to filling.